
DIY skincare isn't normally my cup of tea. Not only is it such a hassle to assemble all the ingredients, there's also the fact that I don't trust myself more than I do an actual skincare chemist—someone who actually knows what they're doing. That said, I'd definitely make an exception if it's the chemist herself recommending DIY-ing a product.
Take vitamin C serum, for example. According to content creator Michelle Wong (who has a PhD in chemistry) of Lab Muffin, it's much better to take the DIY route with vitamin C because it's unstable and decomposes way too quickly. "At 25°C in pH 3.5 in an amber glass, which is light-protective, about 50% is gone in a week," she says. So come to think of it, making a fresh batch every week on your own ensures that your serum is actually working because you'll know that what you're using is as fresh as it can get.
Not to mention, it's actually not that difficult to make at all, and it's much cheaper, too! Convinced now? Below's a complete guide on how to DIY your own vitamin C serum at home, straight from Michelle herself.
What You'll Need to Make DIY Vitamin C Serum:
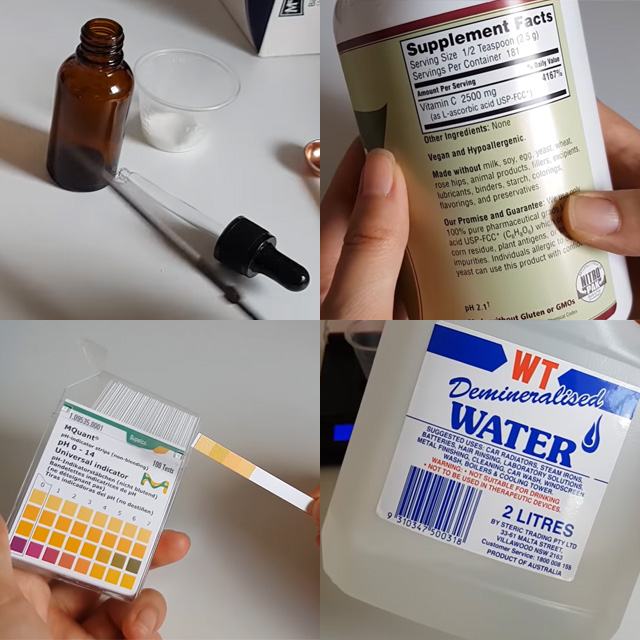
1. Pure L-ascorbic acid powder from a supplement store
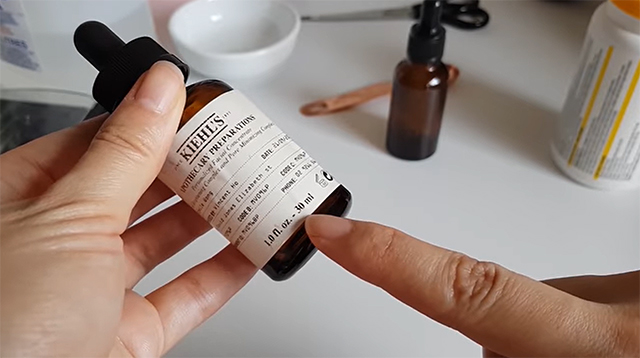
2. Amber glass dropper bottle
3. pH strips
4. Deionised/demineralised/distilled water
Other Materials:
1. Baking soda
2. Medicine Cup
3. Deionised/demineralised/distilled water
4. Aluminum Foil
5. Paper
6. Scissors
7. Measuring teaspoon or weighing scale for the powder
Procedure:
1. Figure out your recipe.
First, decide the percentage of vitamin C you want your serum to have. 10% is a safe bet, but you can go lower or higher (5% to 20%) depending on how well your skin can tolerate it. Next, check how much serum your bottle can hold. If it can hold 20ml, for example, multiply 20 with the quotient of 10 (the percent) and 100. The answer will be the amount of L-Ascorbic Acid powder you'll need for your serum.
Formula: [percentage of vitamin C] / 100 x [volume of bottle] = grams of L-Ascorbic Acid
Sample computation: 10/100 x 20ml = 2 grams of L-Ascorbic Acid
2. Mix the vitamin C powder with water.
The chemist says that while it's important to wash and sanitize your amber bottle before attempting this formula, she also notes that the end product's pH will be too acidic for microbes to survive.
When your bottle is dry, make a funnel by cutting a piece of paper and use it to neatly pour your measured amount of L-Ascorbic Acid powder inside. Add half of the distilled water into the bottle, close it and gently shake the bottle to infuse the powder quickly. After that, add the rest of the water until everything is mixed well.
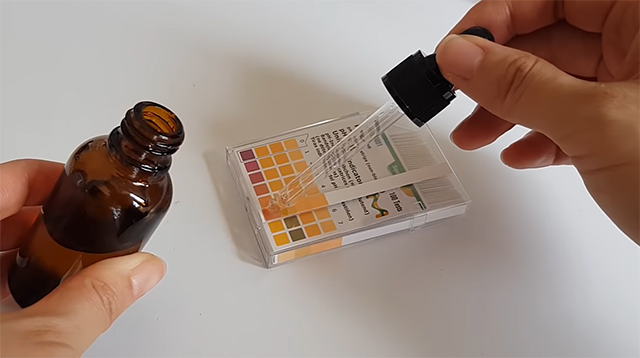
3. Adjust the serum's pH.
At this point, your serum will be too acidic for the skin (around a pH of 2) and could cause irritation. To fix that, add a small (and we mean a toothpick's tip tiny) amount of baking soda into your bottle and use a pH strip to test the liquid's pH level until you reach somewhere between 3 or 4.
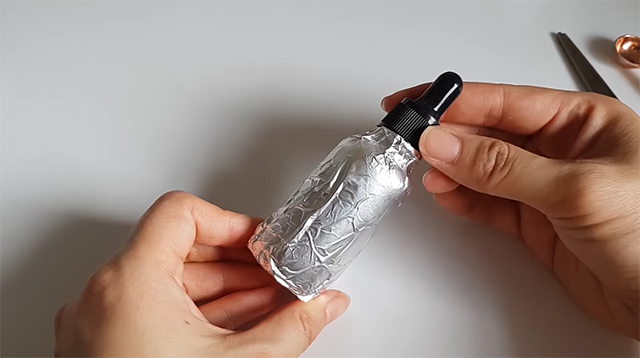
4. Wrap your bottle in aluminum foil.
Exposure to light makes vitamin C oxidize, so covering your amber bottle in foil will keep that from happening faster than it should. According to Michelle, this DIY formula should last you for a week until it turns slightly yellow (still effective but less so) and two weeks for it to turn completely yellow (no longer effective).
5. Remake the serum after a week.
The best perk of this DIY serum is that you'll always be getting a fresh batch of effective vitamin C without spending much. And though it sounds like a lot of work to make it weekly, the chemist says that it's such an easy recipe that you can whip it up in five minutes once you get used to it!
For more info on vitamin C and the full tutorial in motion, watch the video below!
Hey, Preview readers! Follow us on Facebook, Instagram, YouTube, Tiktok, and Twitter to stay up to speed on all things trendy and creative. We’ll curate the most stylish feed for you!